For months I have been trying to meet the challenges set by
I Wanna New Bag and failed miserably!
Yesterday I decided to throw caution to the wind and do this....
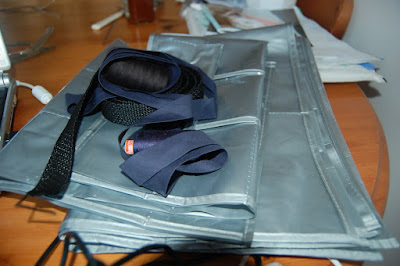
Take one rather unwanted plastic multi-pocket organiser and cut it with a pair of scissors to make a bag and a wallet. I did not actually measure it, but I went with wherever the pockets started or finished.
 Sophie is modelling the pockets for me.
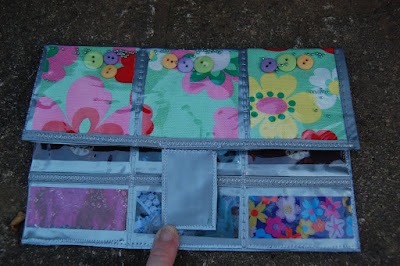
 The above picture shows that I have cut three sections which will become the flap later. I then filled each of the pockets with my MOO cards. The aim was to use photos, but my printer is not working well enough so these seemed a good alternative seeing as they had started off as photos anyway.
I sealed each pocket with a row of stitching. Now this was a pain and I think that I really needed one of those Teflon feet which you can get for sewing oil cloth etc.
I used zig zag stitch to stitch the side and base..JPG) The three pouches with fabric squares make up the flap. Rather than stitching inside it made better sense to stitch the outside.
The three pouches with fabric squares make up the flap. Rather than stitching inside it made better sense to stitch the outside.
.JPG)
As you can see I used an ordinary presser foot, maybe a quilters walking foot even might do the job if you already have one.
.JPG) Using another part of the plastic organiser I folded a rectangle in half and stitched it to gain a place to put a fastening. I did think of Velcro but I may have to rethink that as I am not fully happy with this at the moment.
Using another part of the plastic organiser I folded a rectangle in half and stitched it to gain a place to put a fastening. I did think of Velcro but I may have to rethink that as I am not fully happy with this at the moment.


The finished wallet which I think I might use to keep blogging notes and details that I collect when surfing round to
find new blogs before i add them to my link list.
.JPG)
Inside view. You may be able to see some of the loopy stitching, but seeing as I have only just replaced my free machine embroidery foot at £23.00 I think that yet another machine foot will have to wait.
.JPG)
Completed wallet which is not too bad for a
spontaneous cut and stitch session. No planning
ooooh a bit risky but fun!
.JPG)
I have also cut out enough of the plastic organiser to make a tote as well. As soon as I can print off some photos this will be next. This is a bit off the wall for me but certainly fun to make and I liked the fact that the wallet is able to maintain its shape and design could be added by slotting in some of my favourite pictures.
Do let me know if anything does not make sense and I will change/add it.
I do have a another tutorial to show you that you could use up your stash scraps next week.
Take care.


.JPG)
.JPG)


.JPG)
.JPG) I have also cut out enough of the plastic organiser to make a tote as well. As soon as I can print off some photos this will be next. This is a bit off the wall for me but certainly fun to make and I liked the fact that the wallet is able to maintain its shape and design could be added by slotting in some of my favourite pictures.
I have also cut out enough of the plastic organiser to make a tote as well. As soon as I can print off some photos this will be next. This is a bit off the wall for me but certainly fun to make and I liked the fact that the wallet is able to maintain its shape and design could be added by slotting in some of my favourite pictures. 


.jpg)


%5B1%5D.jpg)


%5B1%5D.jpg)


.JPG)
.JPG)


%5B1%5D.jpg)


13 comments:
wow - how creative and brave are you? that is fabulous! =)
Hi you, how different is this bag!! Very impressed!
I've been trying to email you (re compacts) but 'it' keeps returning them! perhaps you could try emailin me?
Keep up the good work - you inspire us all!
x Vicky x
ooh that's fantastic!!! Love it.
what a clever idea, it looks great, I bet the tote will be very useful too. And those cupcakes look delicious!
: )
What a blimmin good idea!!! I wish I had one of those now! Will have to search the house ... I guess you could make some sort of bathroom organiser out of something like that as it looks pretty steam/waterproof xx
Brillaint idea, and attractive too.
well that is a brilliant idea!! and it looks great!
What a brilliant idea. I love it when you get those spontaneous ideas which then actually translate into reality! It's gorgeous. x
That is such a great idea Julia, brilliant! I love the colours, can't wait to see the tote bag too. I see I missed the cupcakes, they look very tempting!
Kimx
Fabulous!
Sandra
WOW! What a great project! Love it!
What a fantastic idea, well done. Looking forward to seeing the tote bag. I am envious of your Cath Kidston goodies, its good to spoil ones self every now and then!
Emx
Oh, oh, oh!!! An award for you on my blog!!
Post a Comment