Showing posts with label Embroidery. Show all posts

Thursday, 7 January 2016

Christmas Card swap 2015

Last Christmas Sarah  (Twiggypeasticks) and I decided to do a little card swap together.  So why not do it again for a second year?
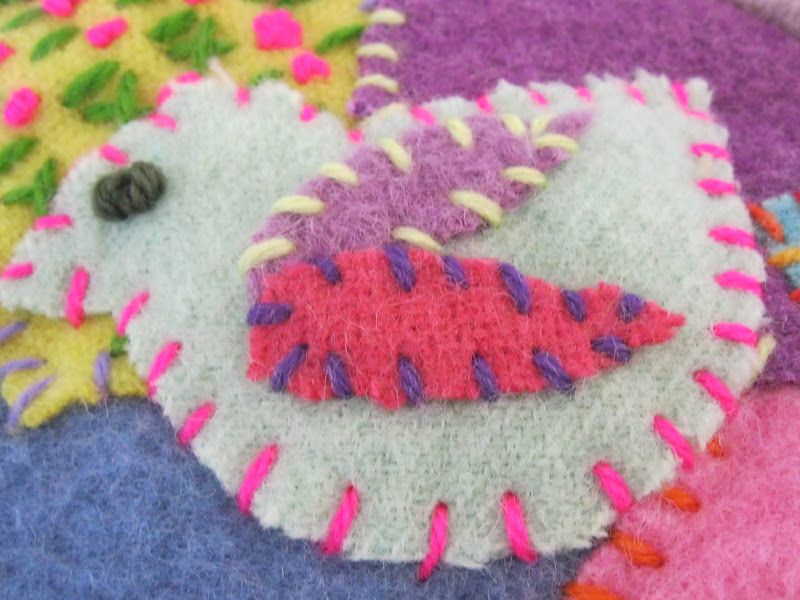
Above is the cross stitch and felt card that Sarah sent me....but there is a twist.......it doubles up as a Christmas Tree decoration!

The colours go with our colour scheme and I think it is a brilliant idea which i think I might pinch for next year.

Of course I needed to send a card too and .......
..............I have forgotten which one I sent....how embarrassing!  I made the set shown above and only these (I really must start much earlier).
So we both had the same technique idea.

I like using hessian and jute  fabrics and combining it with loose linen fabric I thought it made a good change from glitter and sequins.

My new decoration has now been added to my collection of handmade tree decs that have been sent to me by blogger friends since 2008.

Many thanks I love them all and this year for the first time I used them to decorate my classroom and they generated quite a bit of interest!.

Quite glad it is Friday tomorrow been a very long week and my poor old eyes have really felt the strain this week.

Take Care
xx


Friday, 22 May 2015

Image Transfer Tutorial

It has been quite a while since I have put a tutorial on my blog so I thought I would add something that I did with my GCSE group this week.
Image Transfer using an inkjet image and sellotape.

Materials needed:
Image which has been printed out using an inkjet printer (not laser jet).
Sellotape.
Water.
Scissors.

1. Firstly you need to trim down any excess white paper so that yo are not wasting sellotape and time rubbing off areas you are not going to need.  Next cover the front of your image with a layer of sellotape.  Make sure that the edges overlap slightly and check that the image is well and truly stuck to it.  I actually left it stuck to the table while I went and had my dinner!
Next I submerged the image under water.  As you can see I used the sink for this.  I left it for a couple of minutes and judging this time takes a bit of practise.  If you then rub the back of the paper and it seems to some off then take the image out of the water.  Try to rub in a circular motion as this evens out the pressure and you will not rub too hard and take your image off as well.
As the paper backing starts to rub away you should see the image left behind which has transfered to the sellotape.  It will be quite transparent.  If the paper seems to be drying out them add a few drops of water to the paper to continue to rub away the paper backing.
I hope that you can see this alright.  I have put the still damp image up against the glass of my patio windows and the light is showing through.  
The image has really kept its colour and I do not have any holes in the image at all.
All of the students who tried this all got equally successful outcomes.  You can still see the sellotape but i suppose you could turn the image around.  If you put on top of water soluble fabric then you could free machine embroider on to it.  This technique is very easy and would be ideal for transferring photographs (after they have been scanned and printed on an inkjet printer) and scrapbooking/art journaling.
Sophie was really impressed and we are going to see what else we come up with during the half term break.
Have a go!
Let me know if you have any success or if you have any questions.

Wednesday, 15 April 2015

Cross Stitch in Blue - Opam April

I sometimes wonder how I found the time to keep making all these bits of work that I  am finding and spent time completing over the past months.  For example, the above must have taken ages to create and it would have been in the evenings......now I can bearing focus much after 8pm on something as delicate as the above.
Anyway, I digress.  The above is a cross stitch piece on 14 HPI fabric which I am pretty sure was made before Sophie was born!  Last weekend I looked at it and thought "you know what.... it is time you became something better".
I am planning my first organised workshop (more on that later) and I was thinking about little items that could be made to learn how to use their sewing machine.
I also had some home grown lavender so I decided that by sewing some cotton fabric on the back and adding the lavender a lovely sachet could be made.
I added a loop of ribbon to one of the corners and it is now hung up in the back of my car.  I do not like shop bought car fresheners but this has been in the car for about a week and it is lovely.  Again,  out of the box and into the wide world for this piece of sewing.
Blue again as well....must work on something with a different colour palette!
Hope you enjoyed the good weather today.  It got to 24 degrees which is a little bit too warm for a classroom but it was good to see it in April.
Hope it lasts a little while and comes back in the summer months.
xx

Friday, 6 March 2015

A new Arrival

A colleague at work has recently become a Dad for the third time and I was generous to tell the rest of us that baby was to be a girl.
So I have been thinking for the past couple of weeks what my card could look like and I wanted it to feature some stitch.
I used my Brother E0touch mini embroidery machine to create the centre of this card and then mounted it on to pink hand made paper.
I decided to add the cute little bear and a girly ribbon.
The embroidery already announced the arrival of a girl so i added the Best Wishes sentiment and we all do wish the family all the best.

Love making these cards and it will not the last as there are two more babies on the way!
I am also putting together some Mother's Day Cards to take into work next week.  I do not make as many as I used to so it is fun to pick up a craft that has been a bit on the back burner recently.
Have a good weekend.
xx
PS That is odd because on my PC the right picture is present but on my ipad this post has a picture of the Seven Sisters.  I will never understand computers.

Tuesday, 10 February 2015

OPAM February - Angel Wishes

Here it is............. a mini wall hanging and I even managed to find a nice wire hanger which when I got home I noticed that it matched the one sent to me by Kris for the SSCS swap last year!
It has been a while since I have put binding on so I had a bit of fight with the corners and I am still not sure if I won or whether it is a draw.
I did, however, add the free machine embroidery that I love to do.  No problems with that at all.  Don't you just love the gold swirly fabric?  Notice the link there and any excuse to free motion machine to keep all of the layers together.
Now that it is finished it can go on my February OPAM count.
Next up are some cushions covers for the new sofa.
Have a good week.
xx

Thursday, 29 January 2015

Angel Stitchery -Opam

This is an Anni Downes stitchery which is the first task for a Stitch Along to make a quilt using one of her patterns.
See HERE for more details.
I have not signed up as I already have a quilt in progress in the sewing corner which keeps glaring a me every time I walk past.  However I shall be watching and I will try and complete my own quilt.  if I do then maybe i could sign up next year.  
Anyway, the January task was to complete the above stitchery which was offered as a free pattern, which is very generous.  
This is the first example of this style of stitching and I really enjoyed making it.  I now need to decide what to make it into.  
On Saturday I am going to go and visit Coast and country sewing and see if there is a rod or something and perhaps make a small wall hanging and perhaps see if there are any more stitchery of this style while I am there.
HAPPINESS.............
In the end I decided to submit the following for the Monthly Challenge.
I have received some very positive feedback for my first entry which is a nice feeling.  Looking forward to the next theme.
This weekend I also need to sort out two simple cushion covers for the sofa which we bought just before Christmas.  Our previous sofa was 16 years old and was getting to the point where it was uncomfortable so we updated it.  Due to my hip, Hubby thought a decent chair 

Thursday, 23 May 2013

Folded Beaded Needle Case

It has been quite a week, hence little in the way of posts.  However, to follow on from the needle case that I showed a few posted back I thought that you might like to see an earlier one that I made.
Cream cotton was used which I then top stitched with silver thread.
I added clear and pearlised sequins.  Plus gimping cord which I over twisted to form the texture that you can see in the above picture.  I couched it down here and there to attach it.
I sandwiched a loop of narrow ribbon between the front and some lining and together with a round bead I created a simple fastening.
Some crisp white felt cut with pinking shears and stitched between the front and back cover to hold plenty of pins, needles and safety pins.
The overall colour scheme is white and ice blue enhanced with clear seed beads attached with clear nylon thread so that they look like they are sitting on the surface.
I really enjoyed making this, in fact I made two and gave one away as part of an Embroiderers Guild Project.
May be it is time to make another one but with a different colour scheme.
Take care all.
xx

Thursday, 1 November 2012

Wool Blanket Cushion WIP is Finished!!

I had a very enjoyable evening on Monday and finished my cushion made from woollen blanket scraps.
Above shows one of the flowers that I showed last weekend half stitched.  I love french knots, have I said that before?
This little birdie is a design which I came up with a couple of years ago for the Quilt Around the World Swap and has featured on several felt notebook covers.  I sold one of those books last week on Esty.
Lots of shapes and textured stitches.
I was sad when I ran out of room to add anything else and I had to stop the fun of actually making this cushion.
I have kept the back of the cushion quite simple with a double flap opening which has been edged with two rows of running stitch using purple wool.  The backing is made out of a lovely lilac woollen blanket which I managed to find.
So......drum roll please..........
I am sooooooo pleased with how this has turned out.  I put the edging on because at the workshop I could not find a piece of fabric the right for a cushion and I did not fully know what I was going to be making anyway.  I think it frames it and shows up the colours.
 
I have some scraps left and the lilac blanket which I found so I think another blankety based item will be in the pipeline.  I thought another cushion might be a bit much........any ideas?
I think the main attraction of this project is the hand stitching, which is great for evenings in front of the fire!
Many thanks for all of the lovely comments on the WIP post for this cushion and the response on Pinterest too.
xx


Saturday, 27 October 2012

Wool Blanket - WIP

Well it is Saturday and Sophie has been dropped off at a Brownie holiday weekend and we do not pick her up until Monday.  So as promised here I am with my first half-term post.  The above shows a wool blanket cushion that I started at an Embroiderers Guild day workshop last yea,r just before my Dad died, and I never went back to it.  So last night I dug it out and did quite a bit to it.
I love hand stitching and especially french knots.  There is no particular design plan to this at all but just following the guidance and advice of Madeline Millington who ran the workshop and specialises in items made from recycled wool blankets.
I did have some scraps which I had bought from her when she exhibited at Westpoint in Exeter some years ago, so I have always liked her work.
The main cushion is made up of a crazy patchwork style base and then shapes are hand stitched on top using a variety of stitches.  Plenty of stitches too, this is also a good way of using up odds and ends of knitting wool too.
I do have a Bigshot and a few dies that will cut fabric so when I got home I cut a few shapes using the machine but on the day of the workshop I hand cut some random shapes as well.  
 This is still very much a work in progress and along with my Chookyblue Swap item I hope to complete both if these this coming week.  I like the thickness, colours and randomness of this cushion and the fact that you can simply make it up as you go along and use such a wide variety of wools and stitches.
Great fun!!
 

Saturday, 15 September 2012

Quilted Pink Heart

A friend of mine has been making these quilted fabric hearts at our sewing group nights for some time and thought that I would give it a try.
I decided to use free machine embroidery to create the quilting ans some nice pink cotton fabric with  white polka dots.
The heart is stuffed with toy stuffing and I added a little lavender given to me by my Mum's neighbour when we popped back to see her.  I have spent nearly a month drying it out.
I added ribbon to tie the two ends together and to use it to  hang up the heart. I think that next time I will use wider ribbon so that it shows up more and has more shape to add to the overall appearance of the heart.
This was quick and fun to make and I can see more variations of these being made over the coming months.
xx
Many thanks to those of you who left comments with suggestions as to what I could do about my laptop problems.  I have not been able to solve them but \i m up and running on my back up laptop which I have not used much since my last session of exam marking.  I shall sort out the other laptop in due course. 


Thursday, 31 May 2012

OPAM - MAY Hand made felt and embroidery -

Well, May has not been as productive as that of previous months.
This is a little off the wall and I hope that this is acceptable for May OPAM.  I have been doing a lot of hand skills at school lately and wet felt making is one of them.  Many groups have got to grips with water, soapy solution and wool roving.  My latest group is a small group of girls who come to an after school club.  I need to be one stage a head to show them what to do so above is shown my example piece.
So we all made a wet felt piece for the main centre area.
We then taught the girls a few basic stitches.  Some had already completed a Textiles module and had some experience.  The option of adding beads and sequins to their felt to enhance certain areas of their design.  Their design really took on whatever pattern their wet felting created.  So it became a very spontaneous and creative development.
When they have finished their pieces I shall take some pictures for you to see.
I found some small canvases measuring 15cm x 15cm and taking some colours and shapes from their felted fabric and painted on to the canvases using poster paint.
The felt and embroidered piece is then attached to the dried canvas.
The final item can them hung up and admired.
So I have finished mine and after half term the group will put the final touches to theirs.
I shall take pictures to show you all, but the painted backgrounds look really good so far.
xx

Friday, 20 April 2012

Embroidered Sewing Kit OPAM 2012

A few weeks back I posted about finding a marked out piece of fabric that I must have done years ago 
and decided to finish it.....
Well, after having to think what I could make the small panel into (as this bit was not really thought about until AFTER I had cut the edge fabric.  Why did I do that?
Anyway..
This is the front with added flap and fastening.  Then some random free machining to  add texture.
A little iron on flower that I found at the bottom of my sewing box.  I normally do not rate iron-ons very much.  However, this is a really good one!
Plus a "Sew a little Happiness" label too.
I made a little pouch to go on the inside back cover to hold small items such as crochet hooks, tape measure etc.  
I still need to add a few more things, such as a small pincushion, labels for different types if needles and possibly a scissors pocket.  However, I wanted a follow up post to the embroidery one as it did say that I had plans for it.
I am in the process of developing this to make some for the new website.  As you can see it is quite big as I want to be able to take it to my embroiderers guild classes without having to take half of my sewing room. with me.
I shall be back with pictures of the additions once they have been completed.
It has been a very long week and the weather has been soooo unpredictable. Sun? Rain? Boots? Shoes?   Basically, whatever I had on .....it was not the right thing.
Heyho!  ballet run tomorrow as hubby is working away.  Then I think it is Mummy and Sophie time.
I love that time.
xx
This is also one of this months OPAM 2012 finishes.

Wednesday, 28 March 2012

Felt Stitched Notebook Cover

I have been looking through some of my pictures and found this book cover.  I do not think that I have blogged about it before.  It is A5 and all hand cut and stitched.  I love making these in all different sizes and the above design is my own and I have created various versions of it.
There are so many buttons, threads and fabric on the market at the moment that there simply is not enough time to do all of the sewing that I would like!  I have managed to continue with my New Year Resolution of using what I already have.
These re-usable book covers are fun to use and look great on my sewing table.
I have just finished another one but I have not taken any pictures of it.  I completed it whilst at a Craft Fair last weekend and I really must take more to do next time as it was really relaxing and did catch the eye of some passers by.
This will be listed on Etsy later this week.
I shall be away next week so if anyone is interested in anything on Etsy for Easter then yo have until Sunday evening to order it.

I have brought the fleece flower bag home for Sophie and hidden it.  I have a rabbit glove puppet to go in it and I shall sneak off to buy a new top.  Sophie has grown quite a bit lately and those sleeves are getting a bit short on some of her favourite tops.  She has done nothing but eat and eat this past two weeks, another growth spurt I think.
Until tomorrow...............
xx
Related Posts Plugin for WordPress, Blogger...