


%5B1%5D.jpg)


%5B1%5D.jpg)


Here is part two of how I have decorated my dividers for the Malden Personal Filofax so far.
This may appeal to those of you who like scrap booking or card making and by changing the measurements you can create lovely dividers very quickly.
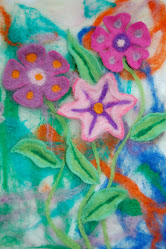
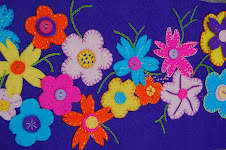
The above picture is a close up of an embossed piece of card.

I used one of these which I have had for some time as I make cards to order and for sale at work. This uses different dies and embossing plates and what I really like is that the bigger dies will also cut fabric.

To create the pattern in the first picture I used the above plate which is made out of a plastic which can put up with being put through a mangle style gadget without cracking and breaking. Lovely design isn't it.........sorry I digress but textiles is my day job.

I put a piece of cream card and sandwiched it between the embossing plates and passed it through the Bigshot. (Show you how in a minute) and then stuck it on to one of the cheap dividers that I referred to in my last Malden post. You can leave it is this stage...or.....

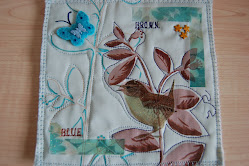
... you can add to it. Seeing as this is very similar to the hand drawn Zentagle designing I showed you in the last Malden post simply get a pen, here is am using a gold paint pen, and highlight certain parts of the design.

Leaving some areas untouched will help to promote a 3D appearance.

Here is a section of the design. Do not over do it, stop every now and then to look at what you have done to see if it is enough.

Then attach to your divider. You could use any pen really, even good old felt tip pens rather than buying anything special. I have used these embossing plates with just a kitchen rolling pin which I pressed down firmly with whilst rolling at the same time, but this can take a bit of practise and can be a bit hit and miss.

These plates can be bought online, from Hobbycraft, Ebay or The Range to name but a few places that I have bought them from. Shop around they do vary in price.
I decided to go one stage further and if you intend on selling your Filofax n the future this may not be for you. I intend on keeping my Purple Malden so I went for it..........

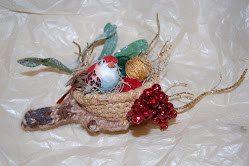
By using a longer plate I could insert the Filofax divider, but I left the tab sticking out.

I put this through the Bigshot.

I hope you can see it, hard to photograph and the light is not good today here in Cornwall. The whole of the divider is now embossed.

This design is much more delicate then the first so using a paint pen will be too much. So for now I shall leave them but I might rub some pastel or inks over it lightly with cotton wool or watercolour paints.

Part of me wishes I could get an embossing plate big enough for my A5 but then on the other hand my personal Filofax is for my website, blog , projects and art ideas so think I shall be keeping it strictly in the personal size for now.
If I add anything to these dividers I will show you but if you have a Bigshot give it a go with either some dividers that need a revamp or some that you cut out yourself.
If you have any questions about what I did or used then leave a comment below.
Take care
x


%5B1%5D.jpg)


.JPG)


4 comments:
Wonderful tutorial. I was amazed by the effects you get from the plates. Your paper dividers look fantastic. Oh dear I think you may have tempted me into a new craft. I could just see me and my goddaughter having a wonderful time with these.
Ali x
Anyone else tried something like this?
Hi! Just wanted to say thanks for stopping by my blog, and that I love the way you've done YOUR dividers as well! I have the Big Shot, but only just a few embossing folders. I love the one you used, and will have to shop around a little better for one so pretty as that!.. Have a great week! ~tina
That looks really interesting!
I like this "pushed" effect!
Hugs,
Tatyana
Post a Comment