Friday 31 October 2014

Happy Halloween!

Now, I have not quite got this round the right way today but never mind. 
Sophie was allowed to be in charge of the pumpkin and the knife this year.  ( I was watching like a hawk mind you.)  She decided what it would look like.
Sophie emptied it out and saved a large number of seeds.
 I have my pumpkin and decorated jam jars outside glowing with candle light and it is too dark to take any decent pictures!  I should have taken them earlier, doh!
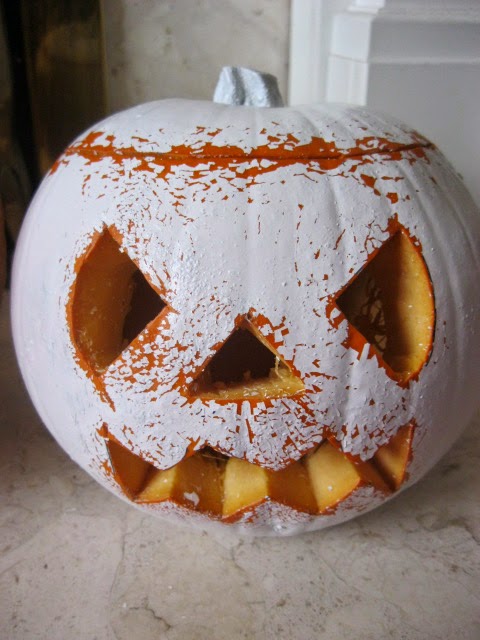
So here is a copy of last years pumpkin................
Well, I have just been asked by Sophie to replace the candles so I took a chance and used my camera anyway.
This is a little blurred but I think you can see the hand painted jar with tissue paper.  We made them in my Textiles club so I hope the others are shinning well in gardens .
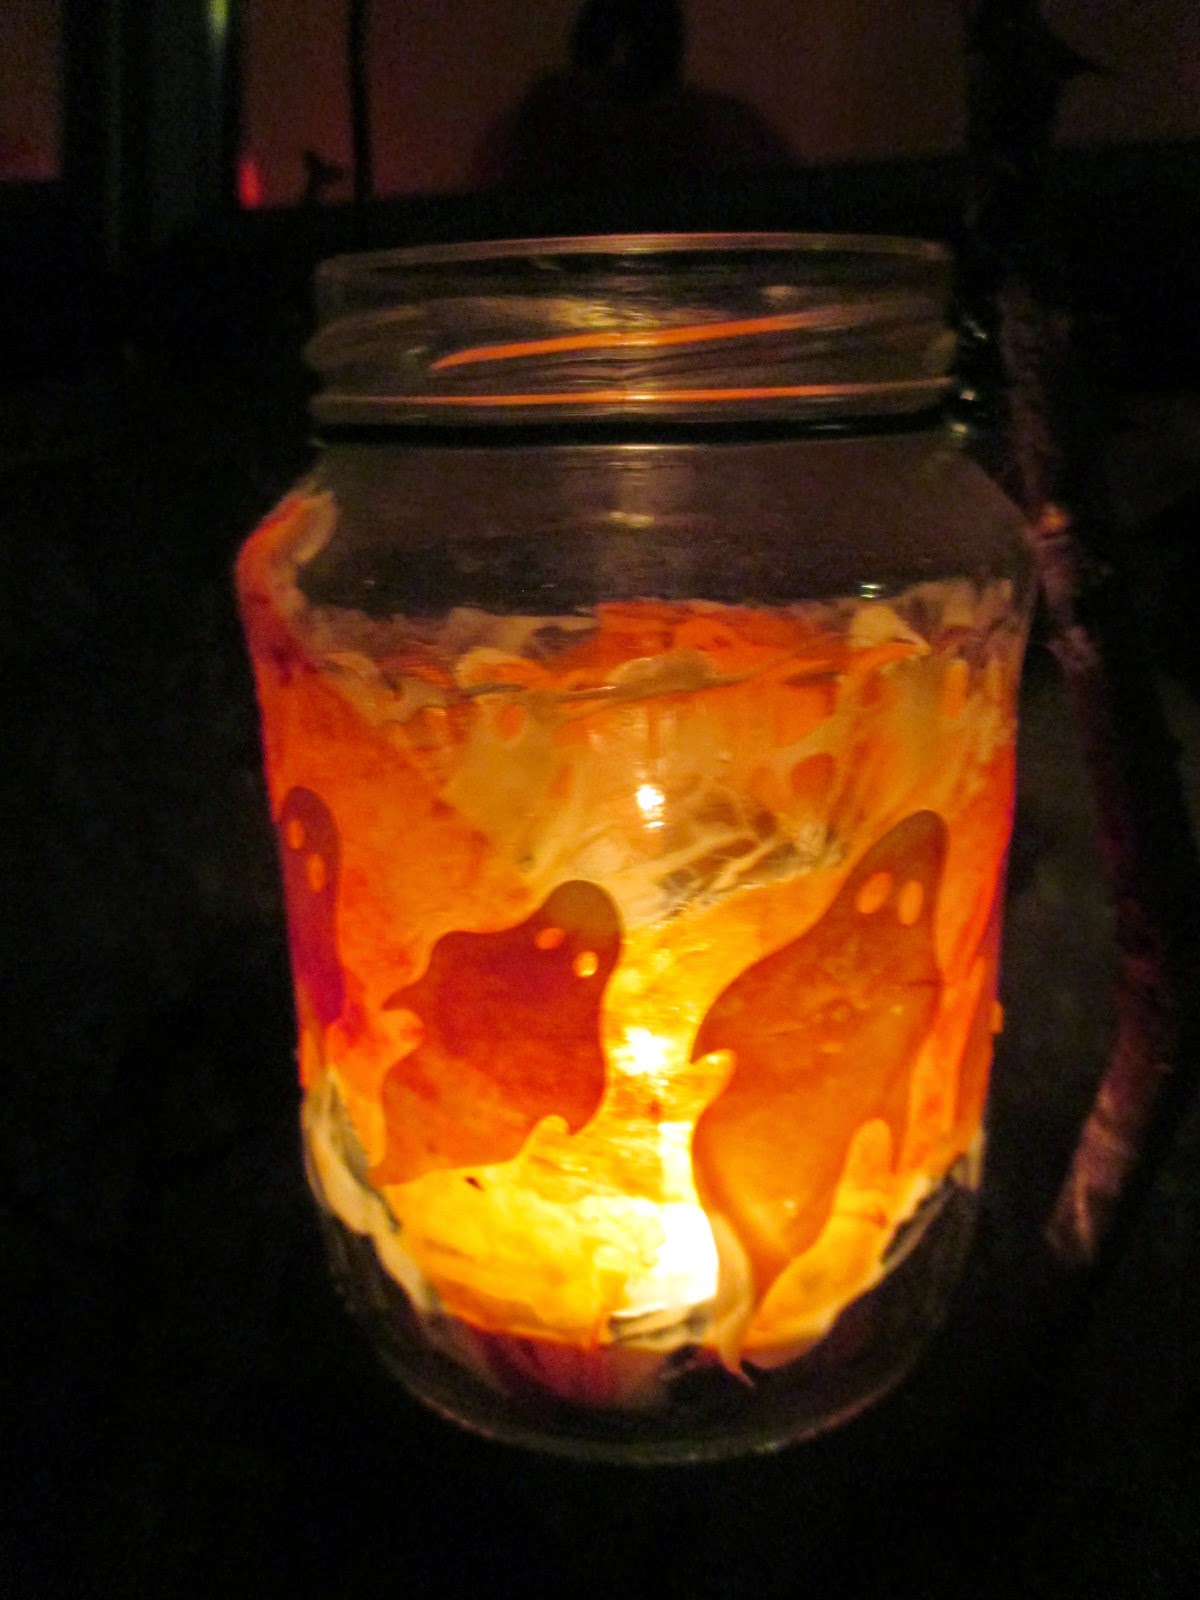
Sophie made this one and then we popped a third outside to give off some more light and I will definitely do them again next year.  They worked really well.
This is Sophie's pumpkin and we decided it was a Happy Pumpkin and the smile sort of reminded us of  Monsters Inc.
Once Sophie and a few friends, plus a parent went off to Trick or Treat I set about roasting the seeds.
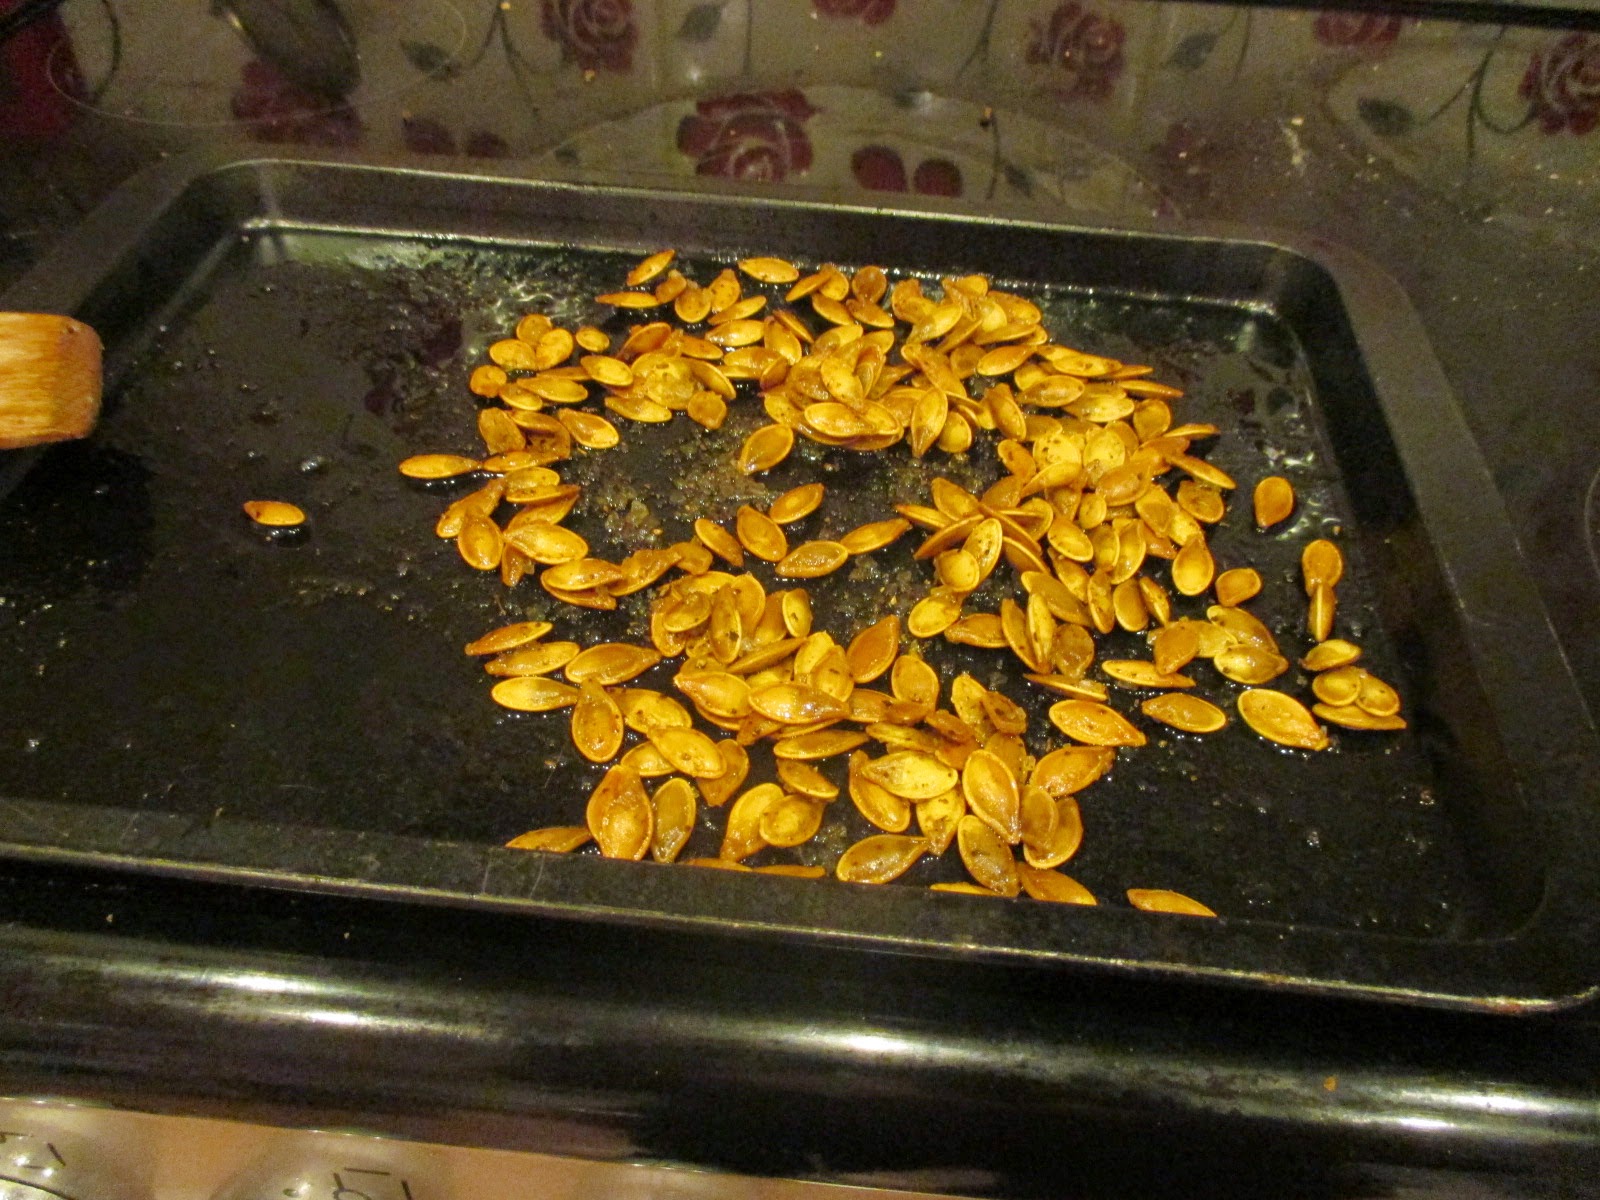
I found a Jamie Oliver step by step on what to do just for something to refer to. At the same time I had a good sort out of my herbs and spices.  Amazed at how many had gone out of date!
Basically:
*Rinsed them.
*Put on a tray
*Cover in Olive oil
*Add Sea Salt
*Any herb or chili something,  I added Italian herbs as everything else by now was in the bin!
*Mix round to cover all of the seeds
*180 oven for 10 mins or until golden brown.  Mine did take longer than 10 mins.
*Allow to cool and then pop in a dish.
*Can be kept for a few days in an air tight container.

I am nibbling a few as I type this. Yum.
Sophie decided to dress up as Hermione Grainger and her friend went as a clown.  I had a few visitors to my door but not as many as last year.  One year I rang out of treats, just have no idea how many will show up.
When Sophie got back we watched Pooh's Heffalump Halloween Movie!  Followed by Scooby-Doo and Spooky Island!  I know how to live  on a Friday night!
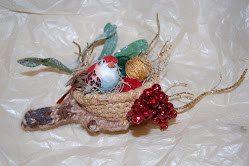
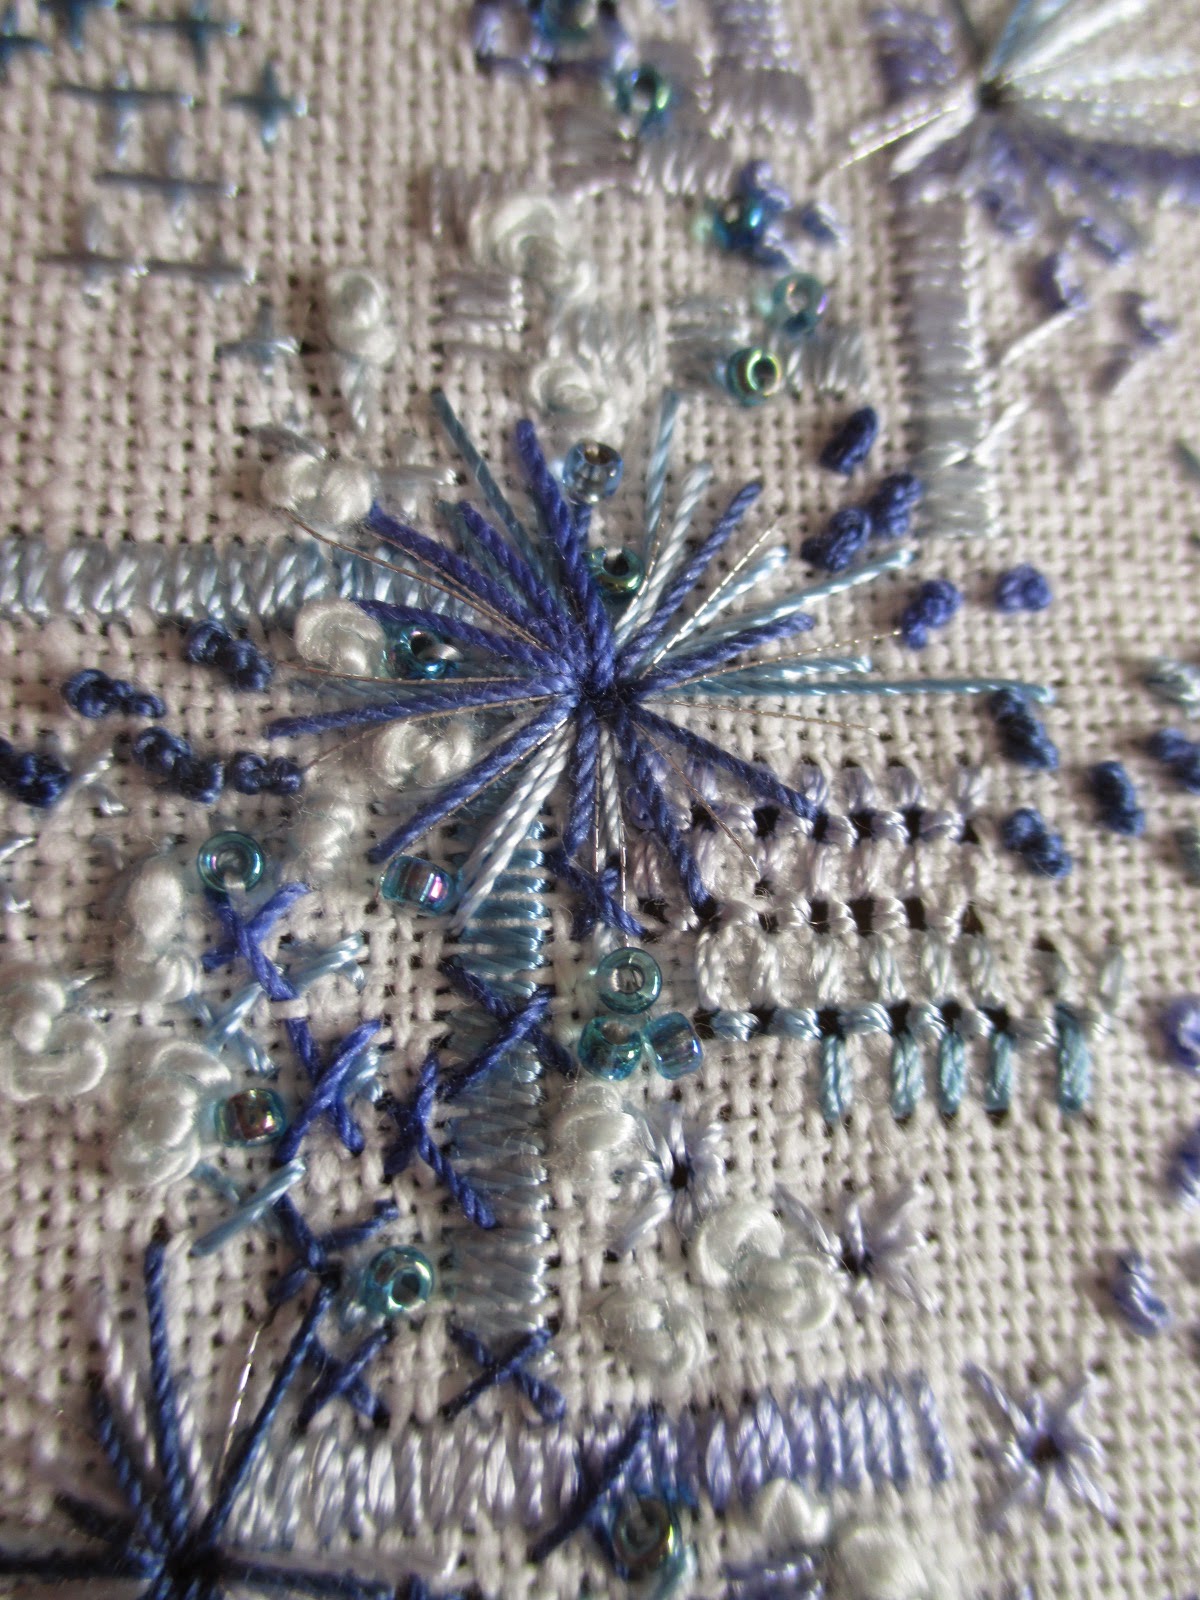
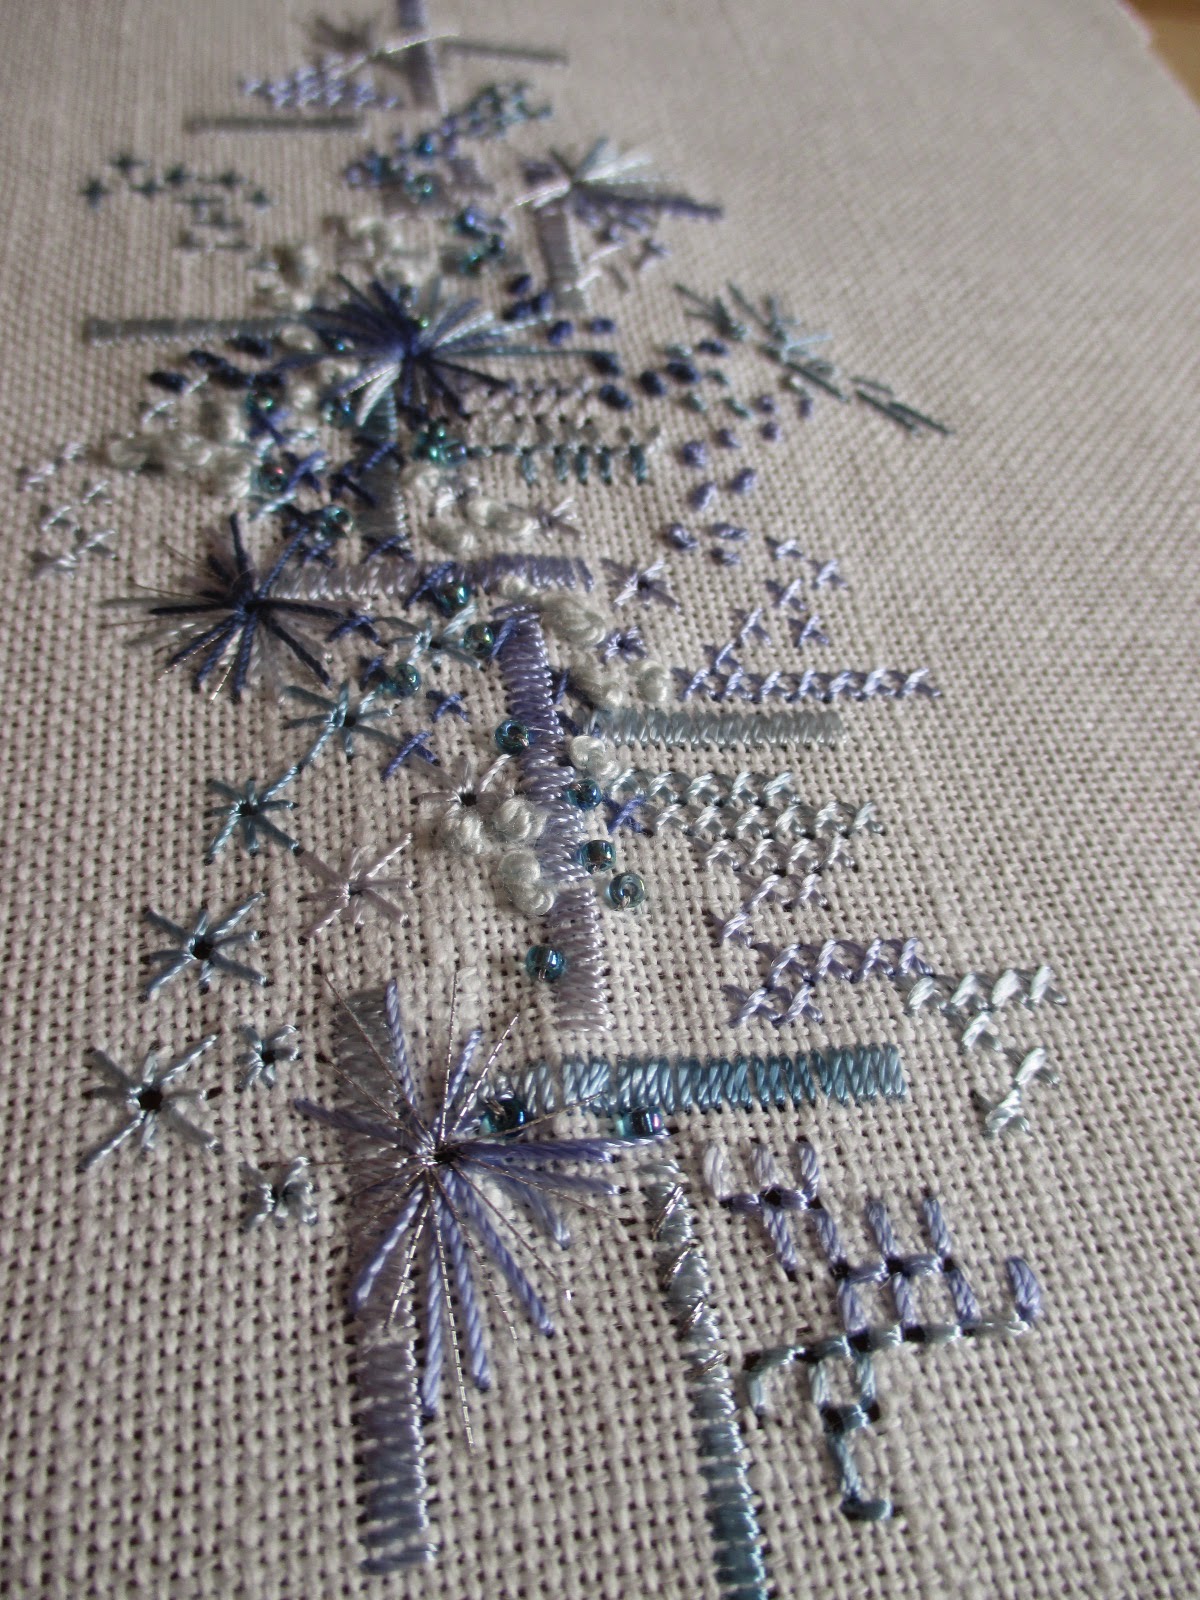
Anyway, another day tomorrow and my first Christmas present is finished and because the young lady who is going to be receiving it does not visit my blog, I shall post a picture or two.
Take care, Oh nearly forgot made a cake as well today.
xx

Thursday 30 October 2014

Fauxdori Sketchbook - Progress so far

You may remember at the end of August that I decided to buy a purple leather Fauxdori notebook made by Ray Blake.
After much looking at it and then work getting in the way, I have sort of finally made a start on it.
So here is a Fauxdori Flip-through to see what I have done so far.
I started by covering the notebook supplied with a Zentagle design using a white paint pen.  I have yet to do the back cover, I shall save that for a rainy day.
I have not put anything on the first page because I am not sure what to add here.
Now, this may not seem very interesting but I decided to try out all of my paints etc to see what they looked like on the page.  I have never actually done this before so I quite enjoyed this!
Just a little sample and I like how it crinkles the page.
I have bought some notebooks with thick paper so with this book I thought I would simply do what i felt like, with no plan, just doodling and drawing what i felt like.  So the above is linked to the hydrangea plants in my garden with water colours and pen.
My beloved Poppy Seed heads which I shall be coming back to again.
I love these fabric houses and I would like to make one.  May be over the Christmas holidays perhaps. Anyway I made a mini moodboard with my favourite pictures.
I liked them so much that I drew my own.
Yes, I really must have a go at a little fabric house.  I wonder if my textiles group would also be interested.
Having just made some ATC's on the theme of postage stamps, I thought that I would make a journal page on the same theme.  I used some Clear Gesso and I have to say that i am not that impressed.  Unless I have done something wrong I found it very gritty and not nice to the touch at all.  I shall keep with it and see what else I can do with it.
I keep adding stamps as things arrive in the post.
I also wanted to note some areas that are covered in my new printing evening class so I decided to use a real Midori Notebook for this one with brown paper.
The paper is quite thin which I did not think I would like, but I do.
I took miniature pictures of our first session of Dry point printing and added those with some basic notes.  The printing that we did went well with the brown paper.
These are created by scratching on to a metal plate with a scribe and then rubbing printing in to the design before printing on special Italian paper.  A little tissue paper is added before the printing stage.
This design was drawn on to aluminium plate with a scribe. This was the first print and I was really pleased with how it turned out.
The photographs are not good really now that the clocks have changed in the UK.
The above design is created partly using a photograph that I had taken of my daisies in my garden and mono type printed it on to parcel paper and then thick cartridge paper.  Love this design and I would like to try it again on a smaller scale for cards perhaps.
So that is where my Fauxdori sketchbook has got to so far and I have another evening class on Monday.
I also managed to get my A level work back today, so light willing I hope to show some of the contents here over the coming weeks.
Will be adding more to my sketchbook and at the moment I have been spending some of my bedtime reading looking at an Art Journalist call France Papillion who is brilliant to watch and learn from.
Take care all
xx

Wednesday 22 October 2014

New A5 Malden Dividers

A slight change in tack for this post.
As many of you know I have an A5 Filofax for my work planner etc and I decided that I might need to some new dividers.  To replace existing ones but to also add a few new areas to my planner.  However I thought I would work with it for a bit first but then last weekend I found half an hour to actually do something about it.
I try not to over stuff it but no sooner have I thinned it out that someone gives me something else to put in it.
This is where it was last Saturday.  Do you like the blue loom band bookmark topper that Sophie made me?
I wanted to keep my Dashboard which is scrapbook paper which I laminated.
I have been using Martha Stewart replaceable tabs but a year on I thought something more sturdy might be in order.
Firstly I found some lovely paper in a cheap stationary shop in Seaford  and I also wanted to make a new Day marker.  Some fun post-its from Paperchase was perfect. with Owls on them looked very book mark like  and just the right sixe.  I love post-it notes and by laminating them they venture in to a whole new range of uses.    So I cut and laminated them.  I added some paper washi tape along one side of the dividers to jazz them up a bit nd to strengthen where the holes would be punched.
Punched holes in all of the dividers.
The cute little owls just peep above the pages.  I later added a hole and Sophie's Loom flower as well.
This time I typed the headings and added them before laminating, to make then stronger.  I also made the dividers a little wider.
The new dividers are more permanent but I have used the same sections for nearly a year so I doubt too much will change.  Did I mention that the new pages have a little sparkle to them?
Sophie was impressed by that bit.
I have also been using Martha Stewart replaceable tear drops to make temporary changes to work schedules and other time plans by putting them in a plastic pocket and popping the tear drop on the front.  I have also been using them in my planner for repeat activities by moving them through the planner as i go.  Found that to be very time saving.
So I have had my Malden for about 18 months and used it daily and I love it.  It cost quite a bit of money but I love the colour, the size everything.  So I think I will be selling my Pink Finsbury rather than having it sitting in its box doing nothing.  The leather is starting to have that used look about it and I like that.  It is maturing..........just like me!  I have also had many lovely comments about it too.
It is the perfect size for reducing A4 paperwork down to A5 and you can still read it and it has cut down on the number of A4 ring binder folders that I used to use.
So, these are my start of the school year changes and I shall see how it goes.  If yo have never looked at the Martha Stewart range then do. in the UK I have found quite a good selection at Staples.
Take care and I shall see you later in the week.

Friday 17 October 2014

A magical little Buy

Every now and again you purchase something which you think is a bargain and then it turns out not to be!
During the summer holidays I decided to get a few cheap little paints to take to evening class but to also put together some teaching resources and I did not want to use my Windsor and Newton paint box.
So at the beginning of the summer holidays we ventured into the Truro branch of the The Range and as usual went our separate ways.
I started looking for paint and found the above little box.
I picked it up but almost at once put it down again and wandered off to search elsewhere.
As I walked round the idea of a stack able box started to appeal especially with the start up of my printing course and not knowing what we might be doing.
At £1.99 I thought I could not lost and if I did not like it perhaps it would do as a stocking filler for Sophie.
Well, when I got home I was very pleasantly surprised.  Off came the wrapping and i started to look at the layers.
The layers twist slightly to hold them together, now this bit is not as perfect as you might think and they do not stay together without fail but enough and once in my Art bag they stay shut.  I was really pleased with the colours and the range that they came in.
They can be mixed and do so very well. I have used them alot since I bought them at the beginning of August and the colours showed up very clearly in any photographs that I took of work using them.  They are just the right size to hold each layer in the palm of your hand (important to me as I do not have very large hands).
I have used them on both fabric (not going to wash it) and on various papers.
This is a Batik that I created on cartridge paper and then colour was added using the above cheap paints.  I think that the colours are a lovely shade.
As I said, fabric is also a surface that I had used these paints on and again I have tried them out with a smaller Batik sample.
I have used these paints for other work which I will feature this weekend and there does seem to be any signs of them running out.  The paint sections seem to be as deep as the central circle which I suppose could be used for water.
Basically, these cheap and cheerful little  pack of paints are a cute size, very portal and contains a great range of colours.
So a magical little Buy.
In fact, I like this box so much that last weekend i went back and bought another one!
xx


Wednesday 15 October 2014

Le Challenge - October - MIX

I have not taken part in Le Challenge for a couple of months due to holiday and work but I thought I would pop in an item that I started a little while ago and wanted to finish.
The above is a hand stitching on blue linen fabric using a wide MIX of threads and beads.
I used any stitch that I fancied doing as long as it was all in shades of blue with a little bit of silver.
In some places the stitches would result in a hole which added to the appearance of the stitching.
I finished it off by adding some beads which I did not have when I first started this sample and I also added some more french knots, which I really enjoy doing. At the bottom I added more stitching to enlongate the design more.  I bought new threads to add to it as I seem to have run out of blue after making another item for a swap I am in.  
I like producing abstract free form stitching like this and just seeing where it takes me.   So my link to the theme is a MIX of threads, stitches, shapes and shades of blue.
 I am now on the look out for a white frame as the spare one that I have does not fit but I have found a spot on the wall in the hall which is where it will hang.

Monday 13 October 2014

Mega Quick Button Brooch

I do not know where the time has gone since my last post.  I have been soooo busy at work that I have really only come home to sleep!
Anyway, we decided to get some fresh air at the weekend and go to a car boot sale and check out what it was like etc as we may book a pitch ourselves in a few weeks time. There was a stall there selling buttons.  So Sophie and I bought one each...............
It is jumbo size button and the design on the front really caught my eye.
My trusty mini glue gun.
A brooch back which I glued on above the holes so that the button will not tip forward  when it is worn.
Pin in on a jumper or top.
And Voila!  A lovely button brooch made in seconds.  I shall be wearing it tomorrow!
Said it was quick...............
My daughter has also made one over on her blog too. http://themousecottagecrafts.blogspot.co.uk/2014/10/button-badge.html
Hopefully I will be back before the month changes!
Take care keep warm and dry.
Where did all that rain come from?  Guess who was on a school trip today.....and yes, it was all outside.
xx
Related Posts Plugin for WordPress, Blogger...